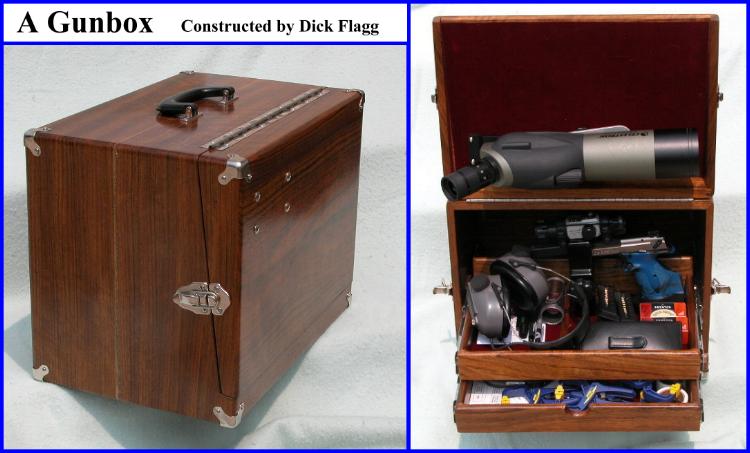
Gunbox Construction Plans by Dick Flagg
Back to Homepage
"The only restriction that I have on the use of my drawings is that they are NOT be sold for commercial purposes. I am an amateur at bullseye and I do not want some individual trying to make money on something that someone offered free." - Dick Flagg (2006)
[Ed's Note] As of yet, I have not been able to reproduce the drawings from the Word document in a manner that is usable on this page. To see the drawings, please download the document below.
Gunbox Technical Drawings provided in .pdf format
Some of the requesters stated that they could not clearly view the attachments and special fastener notes. Here is that page in pdf which should help:
Attachment notes in .pdf format
Dick's Construction Notes:
I wanted 2 trays, which requires the scope bracket to be mounted at the bottom INSIDE, so that the scope would fit in the top section and not under the tray like the commercial gun boxes. I developed these drawings with the thought in mind for only one (1) tray so that the scope bracket will fit at the top INSIDE allowing the scope to slide under the tray. If you only want one tray, do not install the the bottom tray.
The fingers are Gun-Ho, but they will not sell just the fingers. I have found a supplier who will sell a set of four fingers, including threaded rod and nut for $25.00. The point of contact is:
Greg Walloch, President
Precision Pistol Boxes
P.O. Box 4215
Laguna Beach, CA 92651
Phone: (949) 280-7092
Fax: (949) 716-7374
E-mail: gawlbpd@juno.com
When I installed the screws, I pre-drilled the holes and then put soap on the threads of the screws to keep the screws from binding in the wood. Unless I used the soap, it was very easy to strip the slots in the head of the screw and then a big pain in the butt in getting the damaged screw back out.
Another thing that I tried to plan for was to keep the center of gravity of the box with its contents as low as possible. If the center of gravity was too high, then that would make it top heavy and susceptible to tipping over, which is what we DO NOT want to happen.
Note: The following has been added to help clear up a question posed by a reader:
With the final thickness of the wood being 0.500, each piece of wood was cut 0.250 X 0.250 on the inside edge and then joined by quality wood glue. Here is a cross-section sketch of what I am referring to.