
Back to Homepage
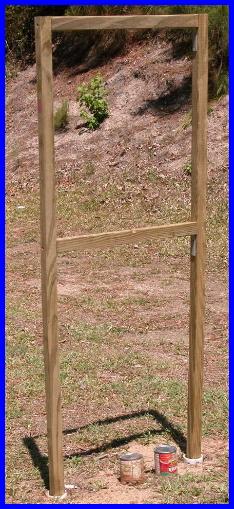
Ensure that the treated lumber is straight. Cut each piece to 72 inches. Cut the remaining pieces to 18-1/4".
Note: The finished dimension across the flats of treated lumber is 1-3/8".
Clamp one small length to the inside of the two 6-foot lengths at one end. Using a corner bracket as a template, layout and pre-drill holes for the wood screws. (Treated lumber can be very hard and can cause difficulty when installing screws without pre-drilling.) Measure from the top of the frame downward 24" and clamp the other small length to the inside of the two 6-foot lengths. Pre-drill and install the remaining corner brackets similarly to those installed at the top of the frame.
 PVC Socket Work
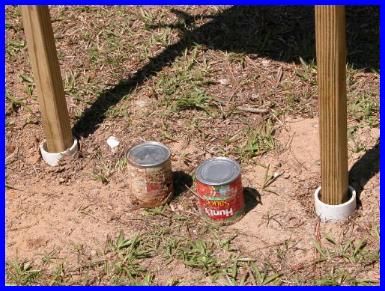
Cut the PVC into (2) 10-inch lengths. Approximately 1" from the bottom of each cut piece, drill through the pipe to accommodate a wood screw, bolt or similar round bar. Insert the screw through the drilled holes so that it sticks out both ends of the pipe. The purpose of the long wood screw is for the posts of the target bracket to rest on and keep the wood from touching wet dirt. The actual dimension of 1-3/8" treated lumber will fit cleanly inside the PVC pipe. Install the PVC sockets in the ground so that the top of each pipe is flush with the surface of the ground. When not in use, cover the open pipes with Huntĺs Tomato Sauce 8 oz. cans or similar size cans. The Huntĺs cans fit securely over the tops of the pipe to prevent debris from falling into the opening.